

As per my previous entry, the brand new Redemptor Dreadnought has been my newest project, and I put the finishing touches on it just last last night. To say the reception of the new mini online was mixed is a bit of an understatement; I fell solidly in the “dear God that looks like a Robocop villain reject” camp – until I actually started assembling the kit, which is without a doubt one of my favorite non-infantry kits that I’ve ever put together. More details and pics after the break.
As I’ve already documented elsewhere, the ease of assembly of this kit is second to none, with wonderfully placed pegs and slots to ensure everything goes where it should, along with a well written instruction manual that made assembly a breeze (kudos to whoever decided to use yellow to indicate which pieces of the parts should take glue). There are locator pegs present on most joints to support the impatient/less-skilled modeller, but these are easily snipped away to allow for a full range of movement and posability options.
One of my favorite qualities of the kit is the fact that it’s super posable – even after it’s painted and assembled. GW took a page out of Bandai’s Gunpla kits when it designed the joints, allowing points of articulation at the shoulder, bicep, and elbow. This makes the Redemptor almost an action figure, even once it’s already on the board!
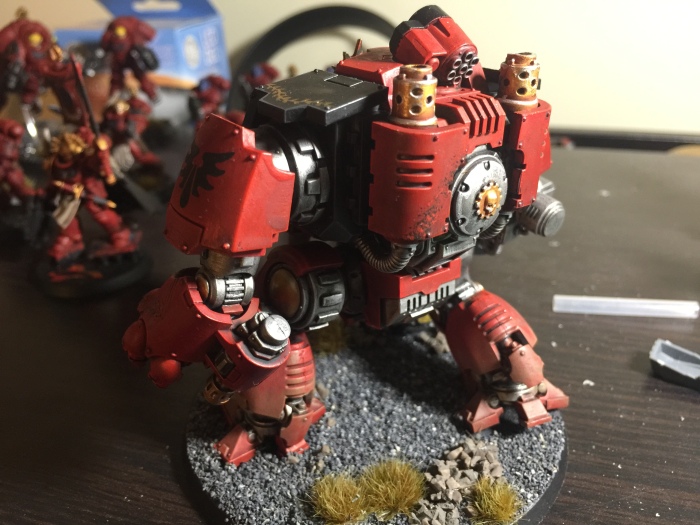
My least favorite part of the kit (and I’m sure I’m not alone on this) is the sarcophagus and the placement thereof. I felt it was placed a little too high on the torso of the dreadnought, and while it presented a nice head/face focal point, it also made the torso appear a bit too large and pot-bellied (the additional armor to protect the sarcophagus also certainly added to that perception). The opening/closing sarcophagus armor was a nice gimmick, but ultimately pointless and added unnecessary bulk.
To this end I decided to change up the torso quite a bit looking to the classic Venerable and Leviathan Dreadnought kits for inspiration. I’d always liked the look of the exposed marine’s helmet beneath a high gorget, so I replicated it as best I could on the Redemptor using parts from the Venerable Dreadnought kit. Bits from the Blood Angels Baal Predator kit in the shape of the halo and the chalice added some necessary Blood Angels flavor to the sarcophagus and filled in some of the holes left by omitting the sarcophagus and its armor. The pennants/banners are also from the Venerable Dreadnought kit.

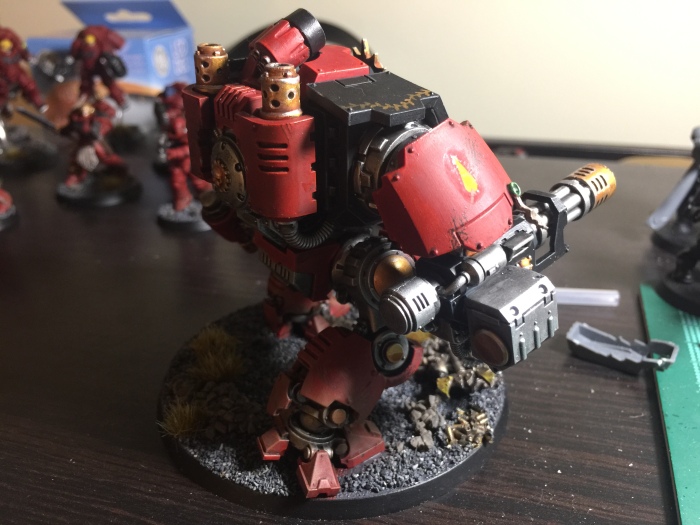
I’m quite happy with the way the rest of the kit looks – it is big, wide, and imposing, just the way I felt a Dreadnought should have always been on the tabletop. It towers over pretty much any other bipedal infantry unit, and its large, imposing weapons contribute significantly to that impression – special recognition for the Heavy Onslaught Gatling Cannon. Now here’s a weapon that looks like it could do some real damage to some charging Orks – and it actually has an ammo box that looks like it could carry a fair amount of dakka!
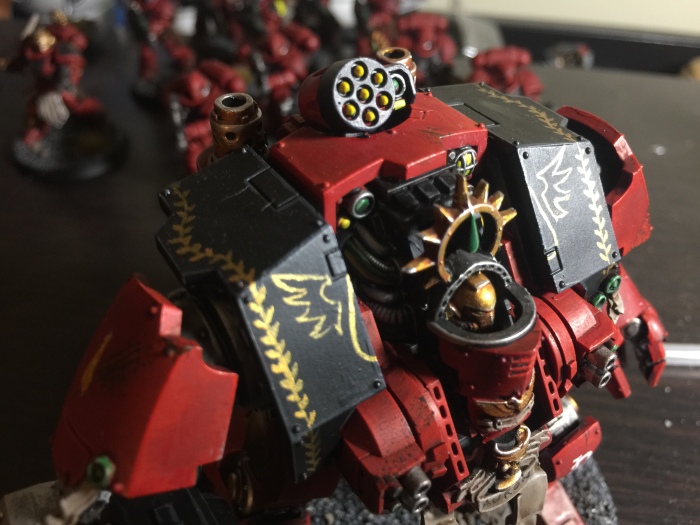
Painting the Redemptor went quite well. I was initially worried about washing the entire thing with Carroburg Crimson as my new recipe for painting red calls for an all-over wash of Carroburg Crimson over the entire model, and my experiences with washing large, flat surfaces on vehicles wasn’t great. I would always end up with brush streaks and obvious puddling. Thankfully I remembered an old trick our lord and savior Duncan at GW taught, which involved mixing an equal part of Lamian Medium with the Carroburg Crimson. This took away a lot of the “streakiness” of the wash and left me with a nice smooth finish on the larger plates. I still unfortunately had some pooling (you can see some on the left shoulder plate in the picture above) but for the most part it worked well.
I decided to leave the major armor plates on the torso in black as I had seen this design on some painted Leviathan Dreadnoughts. I added some freehand laurels (with mixed results) and a bisected outline of a Blood Angels icon on the plates as well. I’m not entirely sure I like it and may go back and re-do it, but for now it looks good enough for the tabletop.

Overall I’m quite happy with the way the kit turned out. It is a large, imposing presence on the tabletop and is in my mind a worthy successor to the venerable Castraferrum “post box” Dreadnought designs of yesteryear. It will no doubt receive the Mortis, Furioso, and other variants down the line, I’m sure. I for one am looking forward to this beast stalking many battlefields to come.
Bonus points if you can name the reference made by the Dreadnought’s name! 🙂
